7 Game-Changing Hiking Boot Lacing Techniques
When did you figure out how to tie your shoes? About age 6 or 7? Well, what your younger self probably didn’t learn back then is that there are tons of lacing techniques to choose from.
Now, this didn’t matter much when you were a kid, but as a badass woman ready to take on the world, it’s a different game. There’s no time for sore feet! So pull those hiking boots on and get ready to learn all about 7 pro lacing methods, which chicks they’re best for, and why your lacing technique matters.
Benefits of Using Different Lacing Techniques
Alright, let’s be honest: none of us are Cinderella, and we don’t own glass slippers that support our feet in all the right places. It’s rare enough to find work boots that fit like a dream. So sometimes, you have to make do with what you’ve got. Of course, this doesn’t mean buying an uncomfortable pair of boots, but the reality is that your foot might need some extra love.
All this to say that how you lace your boots can give you more support where you need it most. Different lacing styles can turn your painful shoe problems into a perfectly fitted pair.
Let’s say you have wide feet, for example. Maybe you found shoes that are the right length, but you need some extra room around the sides. Or it could be the opposite! The pair of hiking boots you wear may need some extra tightening around the ankles. Whatever it is, choosing the right ways to lace boots can make a world of difference.
Contrary to action movies with women sprinting down the street in a pair of stilettos (Ummm, who does this?), we know comfort is king when hiking. So let’s nail down your perfect lacing method before you get on your way. Make painful hiking boots a thing of the past!
For the ultimate hiking experience, explore our guide to the best women’s hiking boots, and consider teaming up with a hiking buddy for safety and camaraderie.
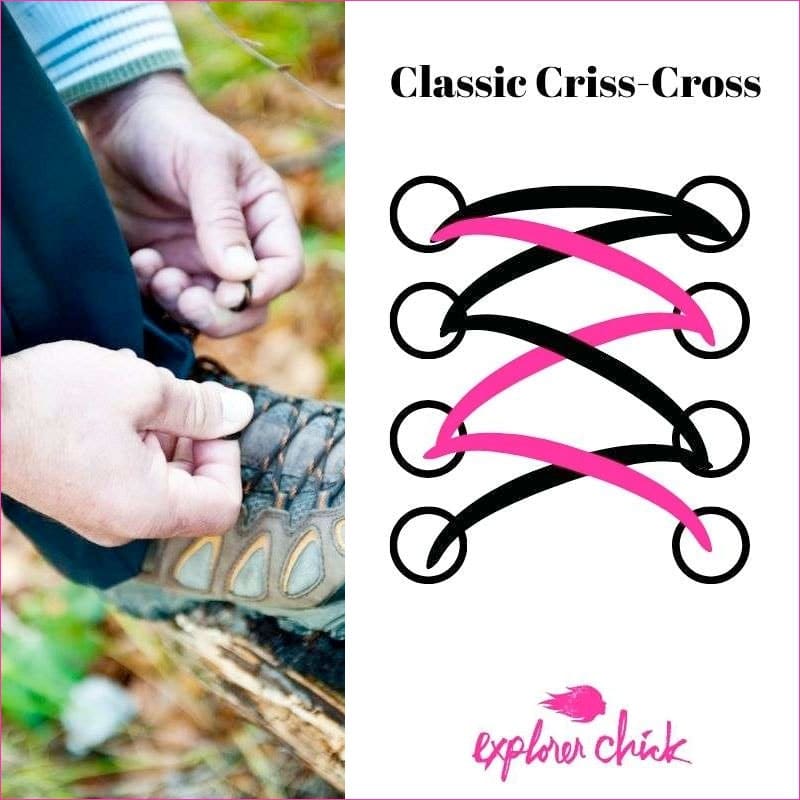
1 Classic Criss-Cross
Best for: Naturally great fitting shoes, no foot problems
As you can guess, this is the original lacing method we all know and love. Criss cross lacing is an easy, efficient, and timeless technique, and there’s a reason why it’s our go-to. It’s perfect for any boots that already fit well — assuming you have no foot problems.
- Thread each lace diagonally up the shoe, pulling each side through the opposite eyelet every time.
- Continue this criss cross pattern in the same order as you work the laces up your shoe.

2 Surgeon's Knot Lacing
Best for: Avoiding unwanted forward foot movement
If you’ve found the perfect boot length, but your feet move around, this lacing method is for you. Surgeon’s knot lacing keeps the heel in place while preventing toe box collisions. It’s great for extra support below the ankle.
- Lace normally through bottom eyelets, then begin surgeon’s knot at top of foot (below ankle).
- Cross laces overhand as if tying a knot, but instead of forming loops, cross again to create another twist.
- Pull boot laces tightly.
- Thread laces through opposite eyelets and repeat until fit is perfect.
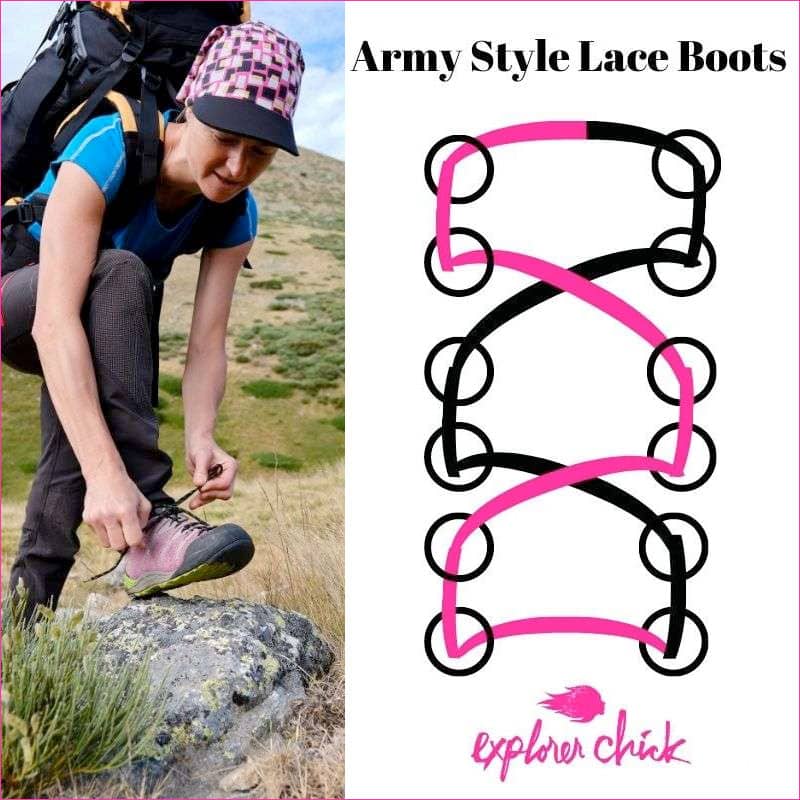
3 Lace Boots Military Style (Army Style)
Best for: Avoiding unwanted forward foot movement
If you’ve found the perfect boot length, but your feet move around, this lacing method is for you. Surgeon’s knot lacing keeps the heel in place while preventing toe box collisions. It’s great for extra support below the ankle.
- Lace normally through bottom eyelets, then begin surgeon’s knot at top of foot (below ankle).
- Cross laces overhand as if tying a knot, but instead of forming loops, cross again to create another twist.
- Pull boot laces tightly.
- Thread laces through opposite eyelets and repeat until fit is perfect.
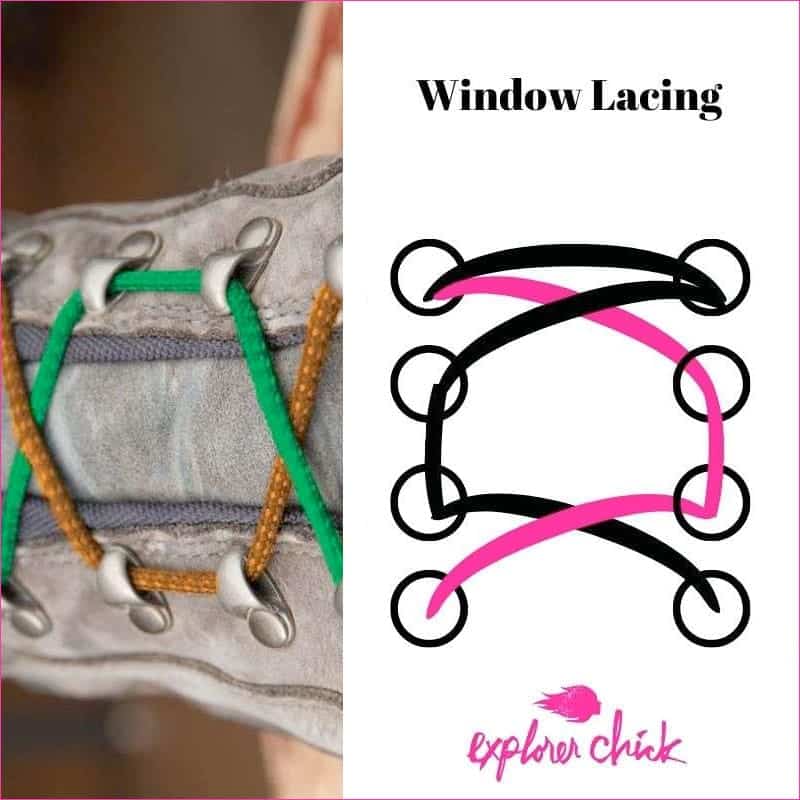
4 Window Lacing
Best for: Relieving top-foot pressure
Did you know that you don’t have to cross the laces every time you’re lacing boots? Well, good news for those in need of some pressure relief! If your hiking boots make the tops of your feet sore, it’s time to re-lace them using windows.
- Begin cross lacing your boots through the bottom eyelet pairs, then stop about a third of the way up.
- Now, tie a surgeon’s knot before threading the lace vertically to the next pair of eyelets.
- Add in another surgeon’s knot, and voila. Pressure-free feet for days.
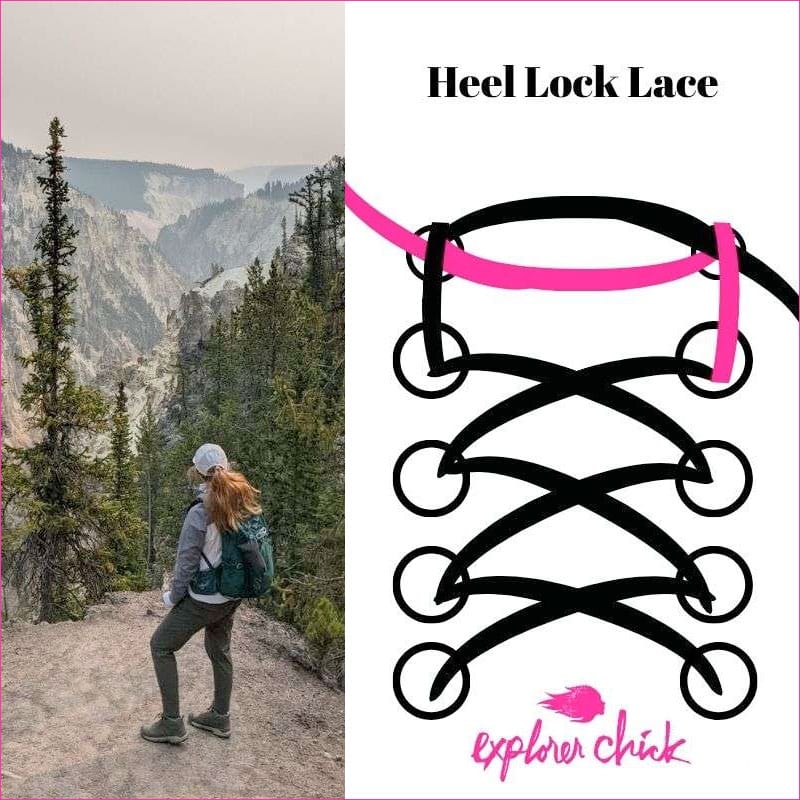
5 The Heel Lock
Best for: Low-rise hiking shoes with heel slippage
While your hiking boots shouldn’t be painfully tight, they do need to be secure enough that your heel isn’t sliding all over the place. Aside from being a safety hazard, you can score some nasty blisters. (Check out these safety tips to stay safe on your hikes.) The heel lock does precisely what it sounds like — it keeps those heels in place.
- Tightly lace your boots, stopping at the second eyelet from the top.
- Then, pull the lace straight up through the eyelet directly above.
- Finally, feed each lace through the vertical bar you created on the opposite side. Now, your heels should stay put, leaving you blister-free!
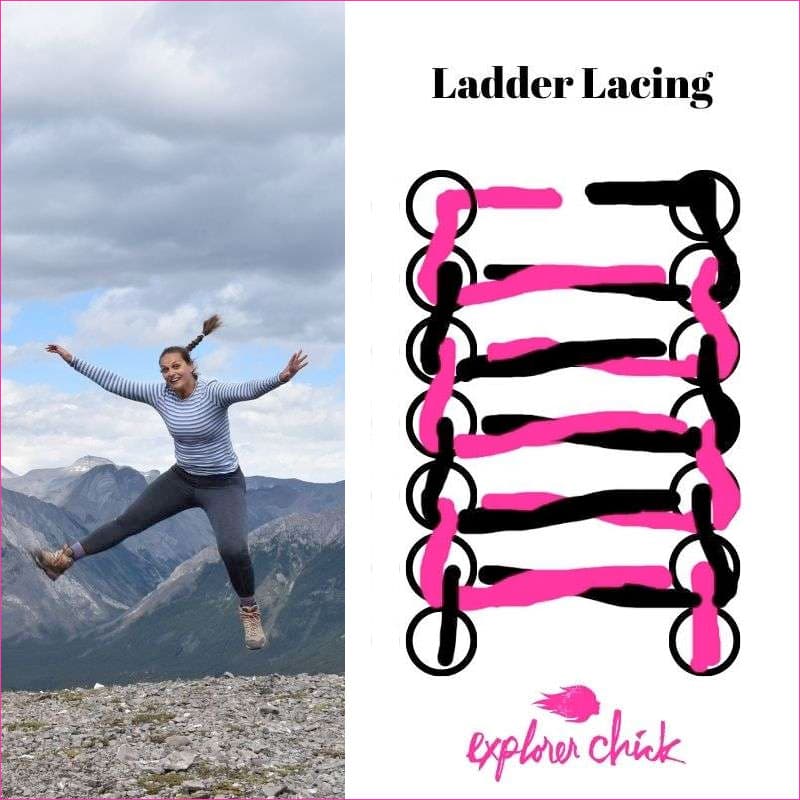
6 The Ladder Lace
Best for: Adding extra security
Try the ladder method if you need some extra security from your work boots. This grid-like lacing technique is ideal for any laced shoes that are a bit too flimsy for comfort.
- Like military-style, lace straight across, pulling upward through the bottom eyelets, then moving the laces vertically through the second eyelet pair.
- Pull the boot laces straight across, wrapping each lace under the previously created vertical section.
- Feed the lace down through the next eyelet pair, and repeat.

7 Friction Free Criss-Cross
Best for: Easy tightening and loosening
Friction is the sworn enemy of all garments. That’s just life! So when laces rub together in traditional crossover techniques, it causes them to wear out faster. The solution? A friction-free lacing, of course.
- First things first: if you have an odd number of eyelets, thread the bottom eyelet outward, but if you have an even number, thread downward.
- Begin with classic diagonal lacing, but alternate entering the eyelet pairs inside and outside. Over under lacing reduces friction on the laces, so you can enjoy them for years to come.

Download our free hiking training guide!
Get your hands on our complete full-body training plan to help you get hiking trip ready — it requires no fancy equipment and can be done anywhere!
Hike With Explorer Chicks!


Related Posts